A qualified field technician can convert the voltage on most standard Advantage Sentra "SK" temperature control units.
Contact the Advantage Service Department with your unit serial number that your unit can be converted.
After confirming that your unit can be converted use this document as a quide to making the voltage change. This document outlines the steps required to change the voltage from 230 to 460 or from 460 to 230 for units manufactured prior to approximately January 1, 2011.
Assistance is available during business hours from the Advantage Service department at 317-887-0729. Contact Advantage for other power supply requirements.

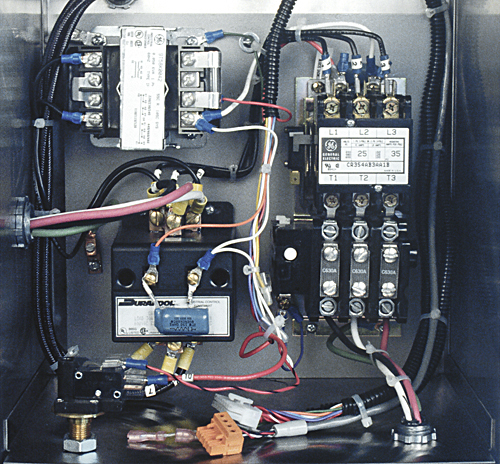
Shown is a typical electrical panel for Sentra temperature control units manufactured prior to January 1, 2011.
For a field voltage conversion, the following items will required replacement or rewiring. Contact the Advantage Service Department for the proper replacement parts.
- Heater Element (rewire)
- Pump Motor (rewire)
- Transformer (rewire)
- Overload (replace)
Voltage Conversion Procedure
- Disengage process operations according to the procedure outlined in the operations manual. Typically, this requires reducing process temperature below 55°F, discontinuing operations and dissipating all system pressure. Follow proper lock-out/tag-out procedures to disengage the main electrical power supply.
- Remove the stainelss steel lift-off cover panel.
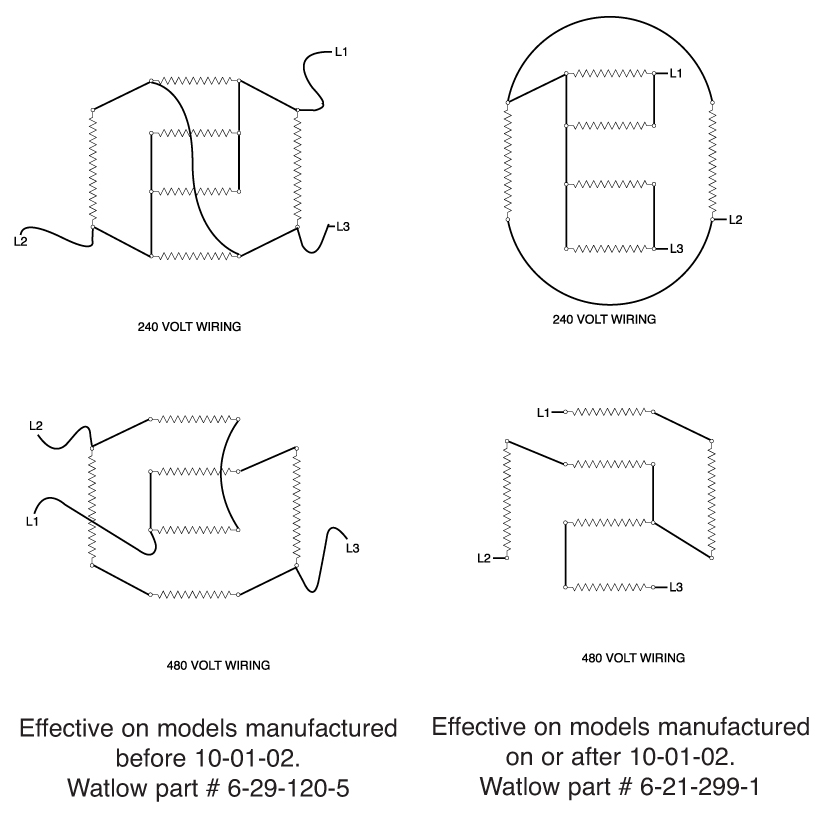
- Locate the heater. Most Sentra units use a single heater mounted in the discharge cylinder. Some units may use a heater in both the discharge and suction cylinders. Note that all heaters must be rewired. Remove the cover plate to the heater junction box and note the current wiring installation. The new installion diagram is show below.

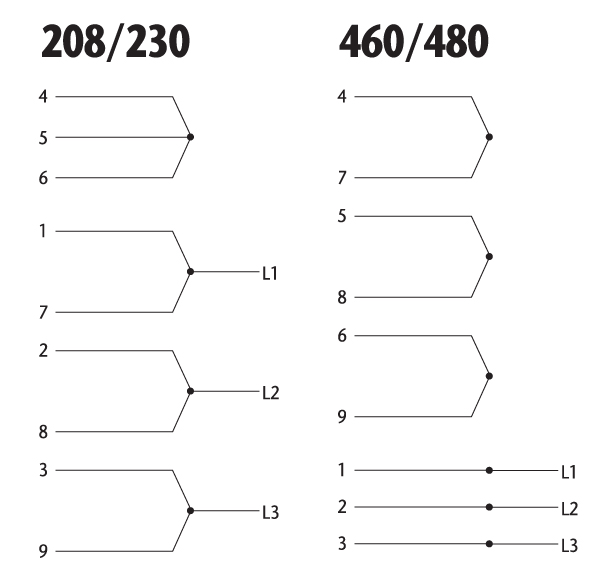
- Open the electrical panel cover to locate the electrical motor. For convenience and greater access area, the panel cover support straps and the instrument cables can be removed so the cover opens flat. Most Sentra pump motors are dual voltage. Note the current installation and the new installation according to diagram below.

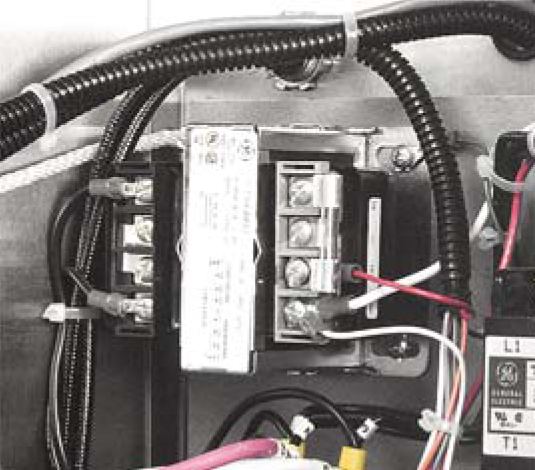
- Locate the transformer mounted on the electrical panel. Note the current installation. A schematic printed on the transformer body details the new installation is shown below.

- Locate the motor overloads. The three overloads must be replacw with a set sized for the new voltage. Simpy unscrew the old set of overloads and replace with the new set. Typical motor overloads are shown below.

- Once a voltage conversion is complete be certain the unit is properly connected to the new voltage supply as outlined in the operations manual. Restart the unit according to the operations manual.


